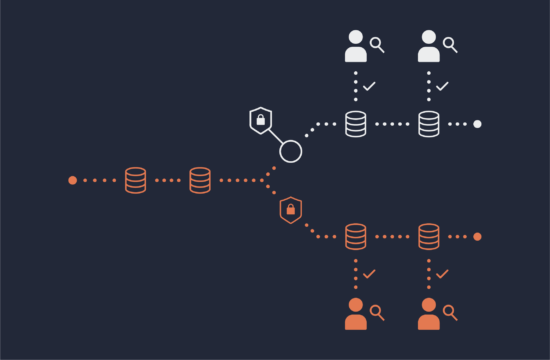
At Okera we like to say “bring your own compute” to your ODAS-enabled data lake. It’s our way of pointing out how inserting access controls between your S3-stored data and your compute framework — Presto, Databricks, Hive, some JDBC-connected application — expands your field of choice. Once you have a unified access model and a common data model, you can pick the application framework you like.
To get started quickly, we provide a CLI utility called odb, a web UI, a REST API, and a Python client library called PyOkera. You can use our docs to get the gist of each and follow the examples. You might even want to setup a notebook to run the examples for each and annotate their output to your liking.
Or you can follow along as we build one for you! In this article, I’ll use PyOkera in a Jupyter notebook to test a fresh ODAS demo install with some stock datasets. By the end of this article, you’ll see that a client setup can be simple, fast, repeatable, even portable to any ODAS cluster to which you can authenticate and access data.
Installing Jupyter on a local machine is simple enough. I followed the instructions here to install python3 and pip3. Get the PyOkera library from PyPi, install it, and you’re ready to go.
Run jupyter notebook from the directory in which you’d like to store your notebooks, or use the –notebook-dir parameter to specify a location. Once you’ve launched a notebook, you can assign variables for your authentication token and the hostname for your ODAS Planner. Import the PyOkera components you need, authenticate, and confirm the version you’re using:
import okera.odas
from okera import context

ctx = context()
ctx.enable_token_auth(token_str=admin_token)
print(okera.odas.version())

1.3.0
In the cell above, I constructed an Okera context and used the admin token to authenticate. The ODAS version shows I’m up to date. Next, I’ll define a function to list the databases. Note that planner in this code stands for the hostname or IP to the EC2 instance that hosts my ODAS Planner. The default value for the port parameter, not shown in this example, is 12050:
def list_databases():
with ctx.connect(host=planner) as conn:
for db in conn.list_databases():
print(db)

list_databases()
cerebro_sample
default
demo
jdbc_demo
okera_sample
okera_system
Now let’s list the datasets in the okera_sample database. There is no USE <database> statement in this context to set the namespace, and so our results come back fully-qualified, e.g., okera_sample.sample. Repeating that prefix with every dataset is tedious, so I’ll use a list comprehension to chop it down:
# List tables in a database
# Does not handle empty databases
def list_datasets(dbase):
with ctx.connect(host=planner, port=12050) as conn:
datasets = conn.list_dataset_names(dbase)
print("%s tables:" % dbase)
list = [elem.split(".",1)[1] for elem in datasets]
print(list)

list_datasets('okera_sample')
okera_sample tables:
['sample', 'users', 'users_ccn_masked', 'whoami']
I’m not checking for empty databases here, but there is always one — called default — to be aware of. It comes with the Hive Metastore component we embed in ODAS. We recommend using it as a localdb, in which multiple users can write intermediate work without clobbering each other’s namespace. You can read more about implementing this feature here.
PyOkera exposes ODAS’ planning and scanning operations as functions you can apply to a dataset or a query. Planning a dataset in this context returns an object that includes any warnings, the number of tasks needed to analyze the set, and a schema object that includes, among other goodies, how many columns there are:
def plan_table(dataset):
with ctx.connect(host=planner) as conn:
result = conn.plan(dataset)
print("Warnings: %s" % len(result.warnings))
print("Tasks planned: %s" % len(result.tasks))
print("Columns: %s" % len(result.schema.cols))

plan_table('okera_sample.users')
Warnings: 0
Tasks planned: 1
Columns: 4
I used the len() function to reduce each property’s raw values to a count. The output is quite noisy otherwise.
Planning a query works the same way and returns the same object type. For the sake of explanation, however, I’d like a different function name to spell things out, so I’ve got a trivial wrapper called plan_query():
def plan_query(request):
plan_table(request)

plan_query('SELECT * FROM demo.transactions_raw')
Warnings: 0
Tasks planned: 10
Columns: 1
I happen to know that demo.transactions_raw has a million records, so I used it here to see how many tasks the Planner would calculate. This result does not reflect how many Workers there are (I have one), but rather how the job should be parallelized based on my resource configuration. We can assume for now each task will handle 100,000 records.
Scanning traverses the records of a dataset, which you can return in a few different formats. That operation can get expensive, so you can apply a max_records parameter to the call if you want. Note that ODAS uses a max_records property in lieu of supporting the LIMIT clause. This is one point of departure in the way ODAS disables user-oriented SQL features. Clients can of course still use the LIMIT clause in their application’s context.
def scan_table_json(dataset):
with ctx.connect(host=planner) as conn:
result = conn.scan_as_json(dataset, max_records=3)
return result

result = scan_table_json('okera_sample.users')
result
[{'ccn': '3771-2680-8616-9487',
'dob': '8-Apr-84',
'gender': 'F',
'uid': '0001BDD9-EABF-4D0D-81BD-D9EABFCD0D7D'},
{'ccn': '4539-9934-1924-5730',
'dob': '7-Feb-88',
'gender': 'F',
'uid': '00071AA7-86D2-4EB9-871A-A786D27EB9BA'},
{'ccn': '5580-7529-3663-6698',
'dob': '22-Oct-64',
'gender': 'F',
'uid': '00071B7D-31AF-4D85-871B-7D31AFFD852E'}]
The simplest way to signify the user context is by returning the result object to the caller, as I’ve done above. Now I can wrangle the JSON output in Pythonic fashion (and context) as I wish. In this example, I’m just using it to suppress the print() function’s default of returning ODAS output in long strings that wrap the width of the display.
Each user record in this dataset consists of a credit card number in clear text, the card holder’s date of birth and gender, and a UUID in place of a name. Perhaps there is some guiding commentary in the dataset to explain this arrangement. And as long as I’m looking for that, I might as well ask for tabular output:
def tabulate(stmt):
with ctx.connect(host=planner, port=12050) as conn:
result = conn.execute_ddl_table_output(stmt)
print(result)

tabulate('DESCRIBE okera_sample.users')
+--------+--------+-----------------------------------------------------------+
| name | type | comment |
+--------+--------+-----------------------------------------------------------+
| uid | string | Unique user id |
| dob | string | Formatted as DD-month-YY |
| gender | string | |
| ccn | string | Sensitive data, should not be accessible without masking. |
Aha. Restricting access to credit card numbers has been delegated to me, under the assumption that some applications may need the full number while others should have it masked. I’ll leave that task for another article and continue exploring with PyOkera. First, I’ll write a simple ddl() function to encapsulate PyOkera’s execute_ddl() function and return a result object. To test it, I’ll call SHOW ROLES to see what personas we include in our demo build:
def ddl(request):
with ctx.connect(host=planner, port=12050) as conn:
result = conn.execute_ddl(request)
return result

roles = ddl('SHOW roles')
roles
[['admin_role'],
['analyst_role'],
['au'],
['de'],
['fr'],
['okera_public_role'],
['us']]
Now we’ve got a quick way to run some arbitrary DDL requests, so let’s create a new database and table using the transactions data we tested with plan_query() above:
ddl('CREATE DATABASE IF NOT EXISTS blog_test')
tabulate('DESCRIBE DATABASE blog_test')

request = """
CREATE EXTERNAL TABLE IF NOT EXISTS blog_test.txns_raw(txn STRING)
LOCATION 's3://cerebro-datasets/transactions'
"""

result = ddl(request)
tabulate('DESCRIBE blog_test.txns_raw')
+----------+-----------+
| property | value |
+----------+-----------+
| dbname | blog_test |
| type | REGULAR |
| Owner | admin |
+----------+-----------+
+------+--------+---------+
| name | type | comment |
+------+--------+---------+
| txn | string | |
+------+--------+---------+
Note we have not duplicated our data. We’ve only made it visible in a new namespace that we can govern with different access requirements. To keep things simple, I’m also not following recommended practice for creating a governed view of the base data. For more on the proper way to control and expose data to your users, see Lars George’s excellent article on schema design and best practices.
Now I’ll write another wrapper for scan_as_json() that returns the result as an object instead printing its contents. Recall that the Planner decided on ten tasks to count the records in this dataset. Here we should see the consequences of that plan in action:
def scan_json(request):
with ctx.connect(host=planner, port=12050) as conn:
result = conn.scan_as_json(request, max_records = 10)
return result

count = scan_json('SELECT COUNT(*) FROM blog_test.txns_raw')
count
[{'count(*)': 100000},
{'count(*)': 100000},
{'count(*)': 100000},
{'count(*)': 100000},
{'count(*)': 100000},
{'count(*)': 100001},
{'count(*)': 100000},
{'count(*)': 100000},
{'count(*)': 100000},
{'count(*)': 99999}]
Indeed, we get the result as a list of ten tasks and their outcomes, including a task that processed one more record than average and a task that processed one less. I’m not sure exactly why this happens, but this split happened to occur in every run I tried.
You might think to run this same query with PyOkera’s execute_ddl() function to sum the result, but that function only supports metadata operations. To reduce (or aggregate) results, you must take the result from a scan operation, as JSON or a Pandas DataFrame, and continue processing in the client’s context.
As the amount of data grows larger, of course, we have to start thinking about our client’s limits, both in terms of its locality and compute resources. For a local notebook, which is neither close to the data nor swimming in available RAM and CPU, some patience may be required.
In this next function I’ll return the transactions records to my laptop so I can count them “locally”:
def scan_pandas(request):
with ctx.connect(host=planner) as conn:
pd = conn.scan_as_pandas(request)
return pd

txns = scan_pandas('SELECT txn FROM blog_test.txns_raw')
txns.count()
txn 1000000
dtype: int64
Now I’ve got the result in the form I wanted, by calling count() on the data frame, but I waited quite a while to get it: maybe two minutes (that felt like an hour). My ODAS log showed the Planner needed about three seconds to do its part, so the rest is all transfer time and an underpowered laptop already running too many other apps. The value of a resource-rich client that leverages its resources wisely on big tasks becomes evident quickly. Take a look at Kevin Grey’s article on incorporating client-side concurrency with PyOkera if you’d like to know more.
To wind this article down, I’ll apply another schema to this data so I can work on a numeric field it contains. As you’d expect, there’s a price associated with each transaction which, given the sku field, appears to have been modeled as a single-item purchase. Let’s say we’d like to know the sum of all the transactions we have along with some basic statistical analysis.
request = """
CREATE EXTERNAL TABLE IF NOT EXISTS blog_test.transactions
(
txnid BIGINT,
dt_time STRING,
sku STRING,
userid INT,
price FLOAT,
creditcard STRING,
ip STRING
)
COMMENT 'Online transactions 2016'
ROW FORMAT DELIMITED FIELDS TERMINATED BY ','
LOCATION 's3://cerebro-datasets/transactions'
"""

ddl(request)
tabulate('DESCRIBE blog_test.transactions')
+------------+--------+---------+
| name | type | comment |
+------------+--------+---------+
| txnid | bigint | |
| dt_time | string | |
| sku | string | |
| userid | int | |
| price | float | |
| creditcard | string | |
| ip | string | |
+------------+--------+---------+
That was the fast and painless part. The price column is a float, so I’ll run it through DataFrame’s describe() function (and go grab a soda):
structured_txns = scan_pandas('blog_test.transactions')
structured_txns['price'].describe()
count 1000000.000000
mean 494.810516
std 288.612457
min 0.000000
25% 250.000000
50% 490.000000
75% 740.000000
max 990.000000
Name: price, dtype: float64
I could have helped myself here, if I wanted, by setting max_records to some reasonable sample size, but I took this test as a reminder of the difference between getting too casual with a lot of data in a local context, and working with larger sets of data in S3. I could also have set up a notebook on an EC2 instance, possibly in the same region as my S3 storage to see how that goes, but again I kept this dead-simple for clarity. I’ll get tired of those long waits soon enough.
Now all you need now is an authentication token to your handy ODAS cluster, access to some registered datasets, and you’re good to go. Happy exploring!